Chris from Celebrations at Home put together one of THE CUTEST kids Christmas parties I have ever laid eyes on. Seriously, I don't know what type of reaction I would have had if I walked into a party designed like this one when I was a kid - there was no detail was left out!
Chris designed this party for her kids a couple of their friends. They dubbed it the Candy Coated Christmas Party because it was all about "sweet decor and decorating their own Christmas trees (ice cream cones) and cupcakes".
The kids were welcomed to the party with their own place setting, which included a personalized apron, a snowman milk bottle, a decorated cookie on a stick that was adorned with a candy cane wreath. In addition to all of that, they were given their own bowls of icing and candies to create their masterpiece "Christmas Trees" and cupcakes.
After creating their works of Christmas art, the kids took their party outside for a bit. After playing in the snow and cold, the were greeted with a hot chocolate bar once inside. While sipping their cocoa, they were given fun stationery to write their letters to Santa.
Scroll on down to see some of the adorable images from this too sweet Christmas party!
To view more photos of this amazing kids Christmas party, head over to the Celebrations at Home blog and check it out. If you aren't a follower of Chris's blog already, I strongly urge you to become one - she provides so much great party inspiration and eye candy... you'll fall in love instantly!
Merry Christmas everyone! We'll be back next week with more party posts!!
Showing posts with label Christmas. Show all posts
Thursday, December 23, 2010
Thursday, December 9, 2010
Real Party: Pink and Green Cookie Exchange
It's Thursday... TGIF tomorrow. I don't know about you, but I have a ton of stuff to get done this weekend in preparation for Christmas (which I can't believe is in just TWO short weeks). My oh my! There just isn't enough hours in the day to get everything done that I would like to. Luckily, I've made time for some blogging this week! Be sure to check out the photos from the Blue and Pink Baby Shower I threw a couple of weeks ago. But before then, check out today's great post, which is all about the holidays... and cookies!
Jackie from Jackie Fogartie Events designed this adorable Pink and Green Cookie Exchange party for her mom and neighbors. As soon as I saw the photos, I instantly fell in love. One of the things I liked best was that Jackie didn't use the traditional red and green color scheme for a holiday party - she mixed it up a bit with a bright pink and a lime-like green. Another element of this party I really enjoyed was the fact she used everyday holiday items (and inexpensive at that) to decorate around the house - a good way to throw a party on a budget!
![]() |
| I love the look of these tree ornaments in jars. This is such a quick and easy way to decorate for the holidays - and it looks great, too! |
![]() |
| Aren't these glitter trees ahh-maay-zing!? Jackie found these little gems at HomeGoods - way too cute! |
![]() |
| I love the simplicity of the candles on the mantel. So simple, yet so pretty! |
![]() |
| I love how these white flowers pop against the pink and green vases and bottles. |
![]() |
| The cookie set up - looks delicious! |
![]() |
| I'm loving the little ornament tags Jackie attached to the cookie take-home boxes. |
![]() |
| I'm a hot chocolate lover, so this hot chocolate bar totally caught my eye when I first saw this party! I mean, seriously, what's better than drinking hot chocolate when indulging in cookies?? |
Thanks, Jackie, for letting us share you super adorable cookie exchange party! I'm sure you can all tell why I just loved this cookie exchange party so much - there were no details left out! Be sure to head over to Jackie's blog to view more photos and read more details about this party. Stick around and peruse her site, she has some great party inspiration that she spices up with her witty personality!
Tuesday, November 30, 2010
Christmas Idea for Family Friends
Gifts for a family can always be so tricky to buy or put together... but this idea from Disney's Family Fun web site is great - plus it's a fun activity for your whole family to make together.
There are a couple of different ways you can put this Gingerbread Family kit together - a) purchase the gingerbread men from your local supermarket, or b) make the gingerbread men by scratch.
If you are interested in making your own gingerbread men, here is the recipe found on the Family Fun site:
Ingredients:
- 4 1/2 cups all-purpose flour
- 1 tablespoon cinnamon
- 2 teaspoons ground ginger
- 1 1/4 teaspoons baking soda
- 1/2 cup butter, room temperature
- 1/2 cup packed brown sugar
- 2 eggs
- 3/4 cup molasses
Directions:
1. In a large bowl, mix flour, cinnamon, ginger and baking soda. In a separate bowl, cream butter and brown sugar with electric mixer. Add eggs in one at a time, then mix in molasses. Slowly add in the dry ingredients, beating after each addition (the dough will become stiff). Divide dough in half, shape into disks and wrap in plastic. Chill for 1 to 2 hours until dough is firm enough to roll.
2. Heat over to 350 degrees. On a lightly floured surface, roll out one piece of dough to a 1/8- or 1/4-inch thickness. Use a 5-inch gingerbread man cookie cutter to cut the dough and use a spatula to transfer the gingerbread people to an ungreased baking sheet. Bake for 10 minutes or until lightly browned. Cool completely. Repeat until remainder of dough is complete.
To assemble kit, line a plastic container with tissue paper and add 4-5 undecorated cookies. Also include white decorators frosting, M&M minis, Cinnamon Red Hots and shoe string licorice in with the cookies. Or add whatever ingredients you like to use when decorating your cookies! When everything is packaged together, add a cute little tag and bow and get ready to deliver the family their gingerbread kit!
If you are looking for other quick and fun ideas for Christmas gifts to make with your kids, head over to the Disney's Family Fun site now!
| Source |
There are a couple of different ways you can put this Gingerbread Family kit together - a) purchase the gingerbread men from your local supermarket, or b) make the gingerbread men by scratch.
If you are interested in making your own gingerbread men, here is the recipe found on the Family Fun site:
Ingredients:
- 4 1/2 cups all-purpose flour
- 1 tablespoon cinnamon
- 2 teaspoons ground ginger
- 1 1/4 teaspoons baking soda
- 1/2 cup butter, room temperature
- 1/2 cup packed brown sugar
- 2 eggs
- 3/4 cup molasses
Directions:
1. In a large bowl, mix flour, cinnamon, ginger and baking soda. In a separate bowl, cream butter and brown sugar with electric mixer. Add eggs in one at a time, then mix in molasses. Slowly add in the dry ingredients, beating after each addition (the dough will become stiff). Divide dough in half, shape into disks and wrap in plastic. Chill for 1 to 2 hours until dough is firm enough to roll.
2. Heat over to 350 degrees. On a lightly floured surface, roll out one piece of dough to a 1/8- or 1/4-inch thickness. Use a 5-inch gingerbread man cookie cutter to cut the dough and use a spatula to transfer the gingerbread people to an ungreased baking sheet. Bake for 10 minutes or until lightly browned. Cool completely. Repeat until remainder of dough is complete.
To assemble kit, line a plastic container with tissue paper and add 4-5 undecorated cookies. Also include white decorators frosting, M&M minis, Cinnamon Red Hots and shoe string licorice in with the cookies. Or add whatever ingredients you like to use when decorating your cookies! When everything is packaged together, add a cute little tag and bow and get ready to deliver the family their gingerbread kit!
If you are looking for other quick and fun ideas for Christmas gifts to make with your kids, head over to the Disney's Family Fun site now!
Letter for Santa
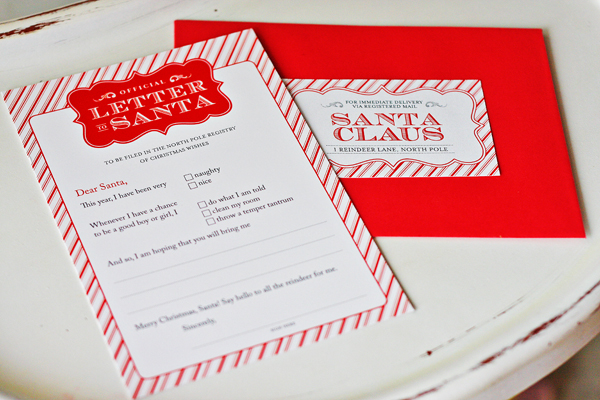
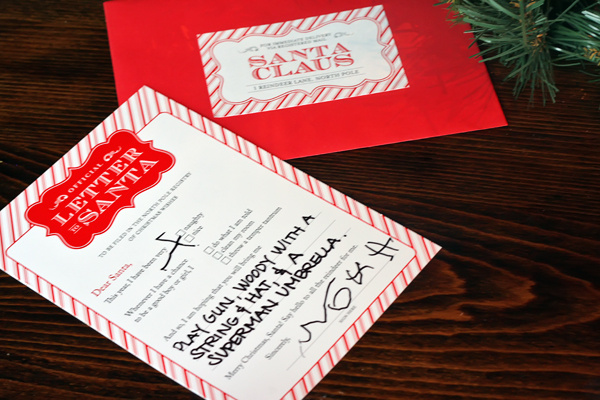
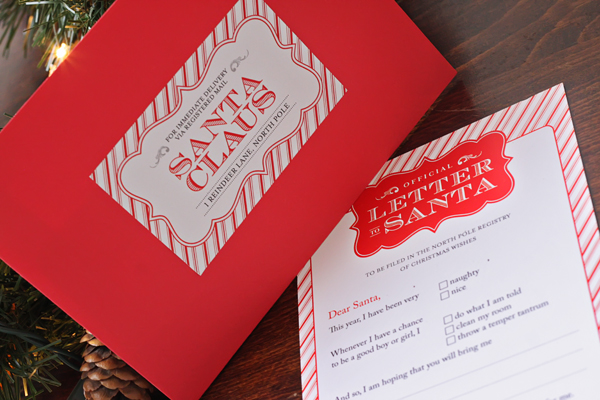
I just can't believe that tomorrow is December already! Goodness - before you know it, it's going to be the new year and I'm going to be a new auntie (my sister's due date is January 1st). Since I'll have so much more responsibility as an auntie, I have to start thinking of fun things to do with my little lady, Eva! When she's old enough, I would love to have her do something fun like this Letter to Santa kit below, created by Heather of Chickabug.
The story behind the Letter to Santa kits: Heather was inspired to create these cuties while looking at the form for a letter from Santa in the grocery store. The letter includes some boxes that your little kiddies can check whether they have been good or bad... and what they're doing when they're being good. It also gives space for them to write their Christmas list and sign their name!
To purchase one of these cute little Letter for Santa kits, head over to the Chickabug shop... or head over to their blog to find out how you can get it for 50% today only!
The story behind the Letter to Santa kits: Heather was inspired to create these cuties while looking at the form for a letter from Santa in the grocery store. The letter includes some boxes that your little kiddies can check whether they have been good or bad... and what they're doing when they're being good. It also gives space for them to write their Christmas list and sign their name!
To purchase one of these cute little Letter for Santa kits, head over to the Chickabug shop... or head over to their blog to find out how you can get it for 50% today only!
Monday, November 22, 2010
Homemade Christmas Idea
Last week I was sitting at the car shop waiting for my car to get finished when I came across this super cute idea for a homemade Christmas gift. I thought this would be a perfect gift idea for a teacher, hairstylist, grandparents, neighbor or as a hostess gift {honestly, you could give it to anyone!}.
| Source |
Who doesn't love hot chocolate on a cold winter's day?? Why not pair some yummy hot chocolate with these yummy chocolate dipped marshmallows?? These 'mallows are such a fun spin on the traditional dipped marshmallows you see around party land. To make these sweet treats, simply insert a straw into a marshmallow and dip into melted chocolate. Let the chocolate "cool" a little, then dip into red sprinkles while chocolate is still slightly soft. Your gift recipient will love having chocolate marshmallows mixed in with their drink... and a straw to drink it with!
**Another cute idea, instead of a straw use a peppermint stick - nothing better than peppermint flavored hot chocolate!**
| Source |
While your marshmallows are cooling, why not make some homemade hot chocolate mix to go with your chocolate dipped marshmallows? Better Homes and Gardens provides a great recipe to create your own hot chocolate mix. All you have to do is package all the goodies together and your friends and family are bound to think you're the sweetest thing since, well, your sweet Christmas gift! :)
What are you favorite homemade Christmas gifts to make??
Subscribe to:
Posts (Atom)