Growing up, I always LOVED roasting some marshmallows over the fire and enjoy a nice, gooey chocolately, graham crackery S'MORE! Still, to this day, I love the taste of a nice s'mores treat, which is why I decided to make this delicious Peanut Butter S'mores Bar recipe from Betty Crocker for my family's BBQ this past weekend.
The recipe is SUPER easy and can easily be made as a last minute treat for your family's BBQ or picnic. There's only a handful ingredients, too.
INGREDIENTS:
- 1 pouch (1 lb 1.5 oz) of Betty Crocker Peanut Butter Cookie mix
(water, oil and egg as called for on cookie mix directions)
- 1 container Betty Crocker Rich and Creamy chocolate frosting
- 2 cups miniature marshmallows
- 2 cups Golden Grahams cereal
DIRECTIONS:
1. Preheat oven to 350 degrees. Make cookie mix as directed on pouch. Once dough forms, press into a 13x9-inch ungreased pan.
2. Bake for 16 to 18 minutes or until edges are golden brown.
3. Scoop frosting into a microwavable bowl. Microwave from 15 to 20 seconds and stir until smooth. Reserve 1/4 cup. Spread remaining frosting over cookie mix. Sprinkle marshmallows and Golden Grahams over frosting.
4. Bake 3 to 5 minutes or until marshmallows are puffed. Let cool for 15 minutes. Drizzle remaining frosting over bars. Cool for another 30 minutes.
See - super easy, right? Here are some more fun s'mores recipes we want to test out this summer -
S'mores Cookies from Grin and Bake It
S'mores Brownies from Lovin from the Oven
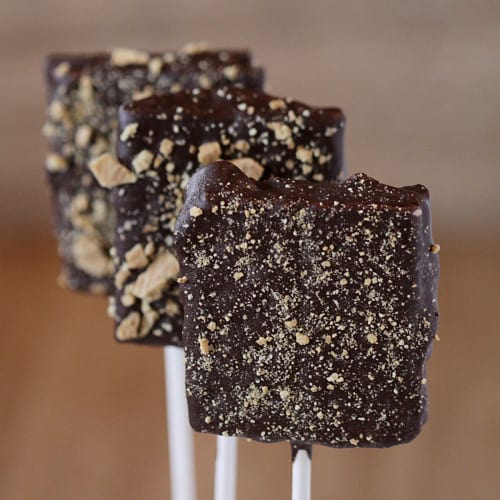
Chocolate Covered S'mores Pops from Love From the Oven
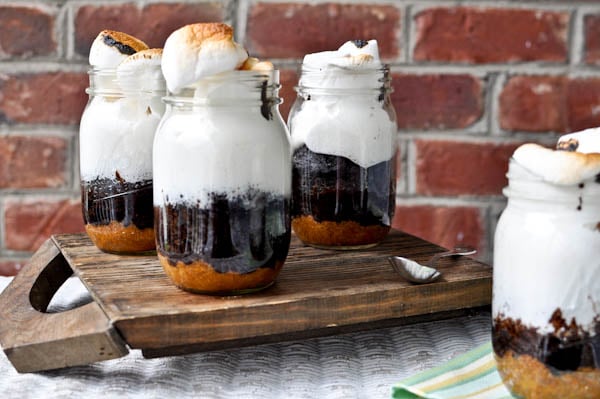
S'mores Cake in a Jar from How Sweet It Is
What S'mores recipes have you tried that are just killer good? What are your favorites desserts to bring to picnics or barbecues?
Showing posts with label baking. Show all posts
Tuesday, July 12, 2011
Sunday, February 13, 2011
No Bake Oreo Cookies and Cream dessert
As some of you may have read in my last post, I'm in the beginning stages of planning my niece's Baptism, which will be on April 17th. The Baptism will be at a church with a luncheon/reception following at my sister and brother-in-law's house. I will be her GODMOTHER {such a huge honor} and since I'm the one in the family who LOVES planning parties, I volunteered to plan the luncheon.
While I'm thinking the color scheme is going to be different shades of purple with white and silver mixed in {since it's a week before Easter, finding items in purple shouldn't be too hard - at least I hope}. I'm also thinking a dessert table would be a great spruce up to the party. In my research for easy and quick desserts, I came across these delicious looking no bake Oreo cookies and cream cheesecakes on Bakers Royale. Read on below for the directions on how to make these yummy treats!
*This recipe makes 16 mini 2-inch cheesecakes or one 8-inch cheesecake*
What you will need:
Crust
- 1 1/2 cups crushed graham crackers
- 1/4 cup packed light brown sugar
- 7 tablespoons unsalted butter {melted}
1. Combine graham cracker crumbs with sugar.
2. Add melted butter and blend until combined.
3. Press into pan and set aside.
Cheesecake
- 2 1/4 cups heavy cream
- 1 pound cream cheese, softened
- 2/3 cup sugar
- 1/2 teaspoon salt
- 1 tablespoon lemon juice
- 2 teaspoons vanilla powder
- 3/4 cup Oreo cookies, crushed
1. Beat heavy cream until medium peaks form. Set aside.
2. Add cream cheese, sugar, salt, vanilla powder and lemon juice to a bowl and beat with a paddle attachment until smooth (about 3-5 minutes). If you do not have a stand mixer or a paddle attachment, a hand beater will work as well, but will take longer to achieve a smooth consistency.
3. Add cream cheese mixture to heavy cream and be until incorporated.
4. Gently fold in Oreo cookies.
5. Fill chosen pan with a slight mound at the center as the cheesecake will be slightly sunken at the center.
6. Refrigerate for at least 6 hours to set, or overnight for best results.
7. Remove from refrigerator and smooth top to level with edges. Serve with whipping cream and garnish with a mini Oreo.
Additional notes:
- Although these were made as mini cheesecakes, you can also make one large cheesecake in a 9-inch baking cheesecake pan or springform.
- If you don't have vanilla powder, you can omit it. Vanilla extract can tint your cheesecake with a brownish color, so it's not recommended. If you choose to use it - about 1 1/2 teaspoons is recommended.
- Keep refrigerated until 20 minutes before serving.
- Chilling overnight will yield the best results.
To get a printer-friendly version of this recipe, and the check out many more delicious dessert recipes, head over to the Bakers Royale site.
While I'm thinking the color scheme is going to be different shades of purple with white and silver mixed in {since it's a week before Easter, finding items in purple shouldn't be too hard - at least I hope}. I'm also thinking a dessert table would be a great spruce up to the party. In my research for easy and quick desserts, I came across these delicious looking no bake Oreo cookies and cream cheesecakes on Bakers Royale. Read on below for the directions on how to make these yummy treats!
What you will need:
Crust
- 1 1/2 cups crushed graham crackers
- 1/4 cup packed light brown sugar
- 7 tablespoons unsalted butter {melted}
1. Combine graham cracker crumbs with sugar.
2. Add melted butter and blend until combined.
3. Press into pan and set aside.
Cheesecake
- 2 1/4 cups heavy cream
- 1 pound cream cheese, softened
- 2/3 cup sugar
- 1/2 teaspoon salt
- 1 tablespoon lemon juice
- 2 teaspoons vanilla powder
- 3/4 cup Oreo cookies, crushed
1. Beat heavy cream until medium peaks form. Set aside.
2. Add cream cheese, sugar, salt, vanilla powder and lemon juice to a bowl and beat with a paddle attachment until smooth (about 3-5 minutes). If you do not have a stand mixer or a paddle attachment, a hand beater will work as well, but will take longer to achieve a smooth consistency.
3. Add cream cheese mixture to heavy cream and be until incorporated.
4. Gently fold in Oreo cookies.
5. Fill chosen pan with a slight mound at the center as the cheesecake will be slightly sunken at the center.
6. Refrigerate for at least 6 hours to set, or overnight for best results.
7. Remove from refrigerator and smooth top to level with edges. Serve with whipping cream and garnish with a mini Oreo.
Additional notes:
- Although these were made as mini cheesecakes, you can also make one large cheesecake in a 9-inch baking cheesecake pan or springform.
- If you don't have vanilla powder, you can omit it. Vanilla extract can tint your cheesecake with a brownish color, so it's not recommended. If you choose to use it - about 1 1/2 teaspoons is recommended.
- Keep refrigerated until 20 minutes before serving.
- Chilling overnight will yield the best results.
To get a printer-friendly version of this recipe, and the check out many more delicious dessert recipes, head over to the Bakers Royale site.
Wednesday, December 22, 2010
My Attempt at Making Candy Cane Cake Pops
I admit, for a long, long time I've wanted to try making the famous Bakerella Cake Pops but have just been WAY too intimidated to do so. When I came across the post Jenn from Hostess WIth The Mostess wrote the other week about how she tried them for the first time, I got inspired. Following her recipe and tips I dove right into my first attempt at making a cake pop...
Saturday night I didn't have big plans so I headed to my local SuperTarget and Michaels to purchase all my ingredients - one box of cake, one can of vanilla frosting, one jar of peppermint extract, one box of candy canes and one package of white candy melts (I already had the lollipop sticks at home) - and got started.
Here is how they turned out:
I am content with how they turned out, however I need to practice my dipping skills a little more. When I molded the cake mixture into little balls, they were nice and round, but when I dipped them, the chocolate made them look a little crazy (I loved the tip Jenn gave about adding the crushed candy canes on top to take away from the imperfections of a not-so-perfect cake ball).
What else did I learn from this whole cake pop experience?
1. It's a very long process - do not start at 9 p.m. because if you're a slow worker (like me), you will be up until all hours of the night trying to finish (3 a.m. to be exact!).
2. If you are adding peppermint to your cake batter (prior to baking it) for extra flavor... do not measure it out over the bowl - that peppermint extract comes out fast! (Thankfully, the cake pops still tasted good... I think some of the peppermint flavoring baked out.. whew!)
3. Mix, mix, mix your frosting and your crumbled cake like crazy! I didn't get enough frosting for the cake on the bottom of my bowl and it was hard to form the balls. If you have too much frosting (which happened toward the top of my bowl), the cake balls become very sticky to form and don't hold their shape as well.
4. Make sure you have enough room in you freezer to fit the cake pops in after you have inserted the lollipop sticks - sticking them in the fridge for 15 minutes isn't long enough and the stick will start to slide out when you're tapping excess melted candy off (if you don't have enough room, be prepared to wait a long while so they can firm up to be able to dunk in melted candy).
Be sure to head over the the Hostess blog post if you haven't read her story about her experience making these awesome candy cane cake balls - I must say, hers turned out much better looking than mine!
I can't wait to make these again for an event... but like I mentioned, next time, I won't start the baking process at 9 at night... it will be an all day affair! :)
I'd love to hear what tips you have for making cake pops? Do you have a cake pop horror story??
Saturday night I didn't have big plans so I headed to my local SuperTarget and Michaels to purchase all my ingredients - one box of cake, one can of vanilla frosting, one jar of peppermint extract, one box of candy canes and one package of white candy melts (I already had the lollipop sticks at home) - and got started.
Here is how they turned out:
I am content with how they turned out, however I need to practice my dipping skills a little more. When I molded the cake mixture into little balls, they were nice and round, but when I dipped them, the chocolate made them look a little crazy (I loved the tip Jenn gave about adding the crushed candy canes on top to take away from the imperfections of a not-so-perfect cake ball).
What else did I learn from this whole cake pop experience?
1. It's a very long process - do not start at 9 p.m. because if you're a slow worker (like me), you will be up until all hours of the night trying to finish (3 a.m. to be exact!).
2. If you are adding peppermint to your cake batter (prior to baking it) for extra flavor... do not measure it out over the bowl - that peppermint extract comes out fast! (Thankfully, the cake pops still tasted good... I think some of the peppermint flavoring baked out.. whew!)
3. Mix, mix, mix your frosting and your crumbled cake like crazy! I didn't get enough frosting for the cake on the bottom of my bowl and it was hard to form the balls. If you have too much frosting (which happened toward the top of my bowl), the cake balls become very sticky to form and don't hold their shape as well.
4. Make sure you have enough room in you freezer to fit the cake pops in after you have inserted the lollipop sticks - sticking them in the fridge for 15 minutes isn't long enough and the stick will start to slide out when you're tapping excess melted candy off (if you don't have enough room, be prepared to wait a long while so they can firm up to be able to dunk in melted candy).
Be sure to head over the the Hostess blog post if you haven't read her story about her experience making these awesome candy cane cake balls - I must say, hers turned out much better looking than mine!
I can't wait to make these again for an event... but like I mentioned, next time, I won't start the baking process at 9 at night... it will be an all day affair! :)
I'd love to hear what tips you have for making cake pops? Do you have a cake pop horror story??
Subscribe to:
Posts (Atom)